Inflation Controllers
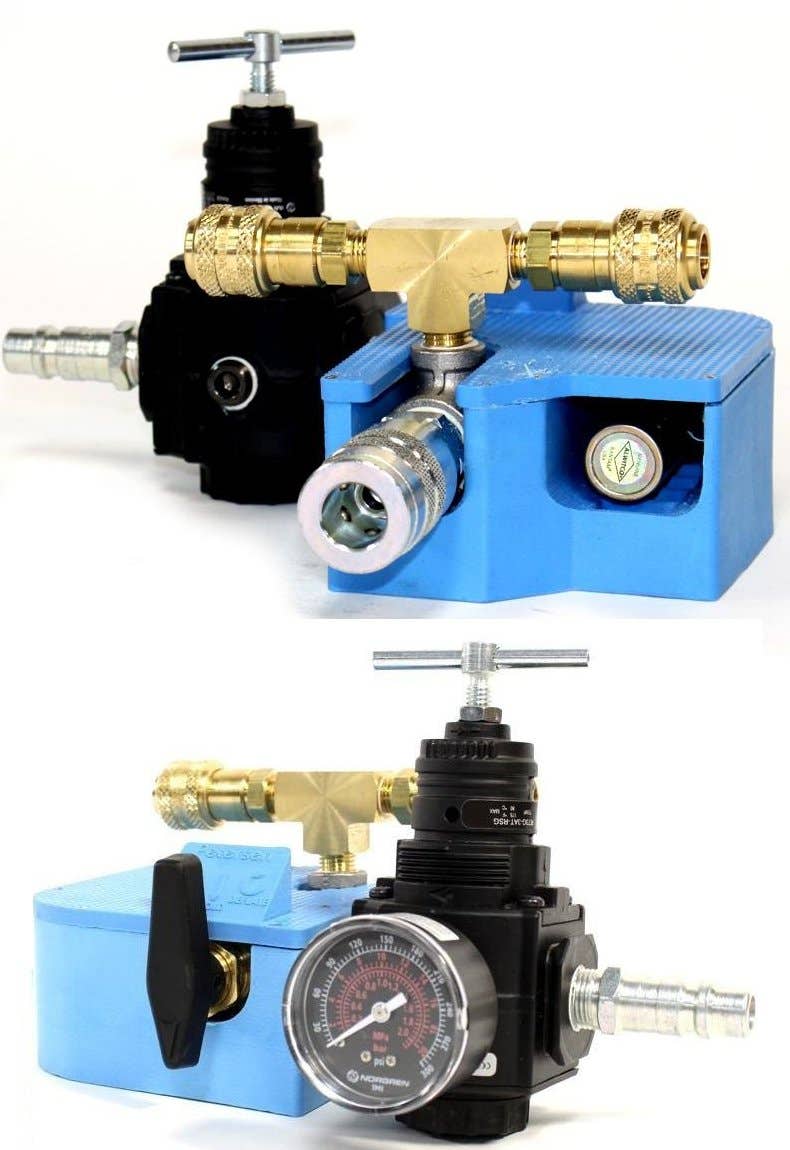
Inflation Controller features:
- ½” QD Plug – connect to air inflation source.
- Regulator Pressure Adjustment T-Valve – Delivers constant pressure to the plug. The Regulator slowly bleeds any increases in air pressure. The regulator uses a relief-style design. Clockwise to increase and counter clockwise to decrease pressure setting.
- Lock Nut – Locks pressure setting.
- Pressure Gauge – Displays the actual input pressure reading.
- 3-Way Valve – Controls the inflation pressure to inflate, hold or deflate out to atmosphere.
- Air Exhaust Port – deflates to atmosphere.
- 2x ¼” QD Couplings –couplings to connect pressure gauges and pressure relief valves.
- ½” QD Coupling – connect to air inflation hose ½” QD plug.

| Image | Description | Pressure | Connection Type | Shipping Wt. | Item Number | Price | Qty | Action |
|---|---|---|---|---|---|---|---|---|

|
Precision Controller, Inflation Air with adjustable regulator and valve, 0-30 psi | 250 psi (17.2 bar) Max Inlet | 1/2" Quick Disconnect Plug & Coupling | 4 Lb (1.81 Kg) | 936-1050-30A |
$478.00
|
||

|
Controller, Inflation Nitrogen, 1/2" QD, 250 psi | 250 psi (17.2 bar) Max Inlet | Quick Connect 1/2" Cplg & 1/4" Cplg | 936-1050-300 |
$582.00
|
|||

|
Controller, Inflation Air with adjustable regulator and valve, 30-200 psi | 250 psi (17.24 bar) Max Outlet | 1/2" Quick Disconnect Cplg. & Plug | 5 Lb (2.27 Kg) | 936-1050-250A |
$450.00
|
||

|
Precision controller, Inflation Air with adjustable regulator and valve, 0-15 psi | 250 psi (17.2 bar) Max Inlet | 1/2" Quick Connect Cplg & Plug | 4 Lb (1.81 Kg) | 936-1050-15A |
$478.00
|
Remote Placement Expander Plugs Instructions
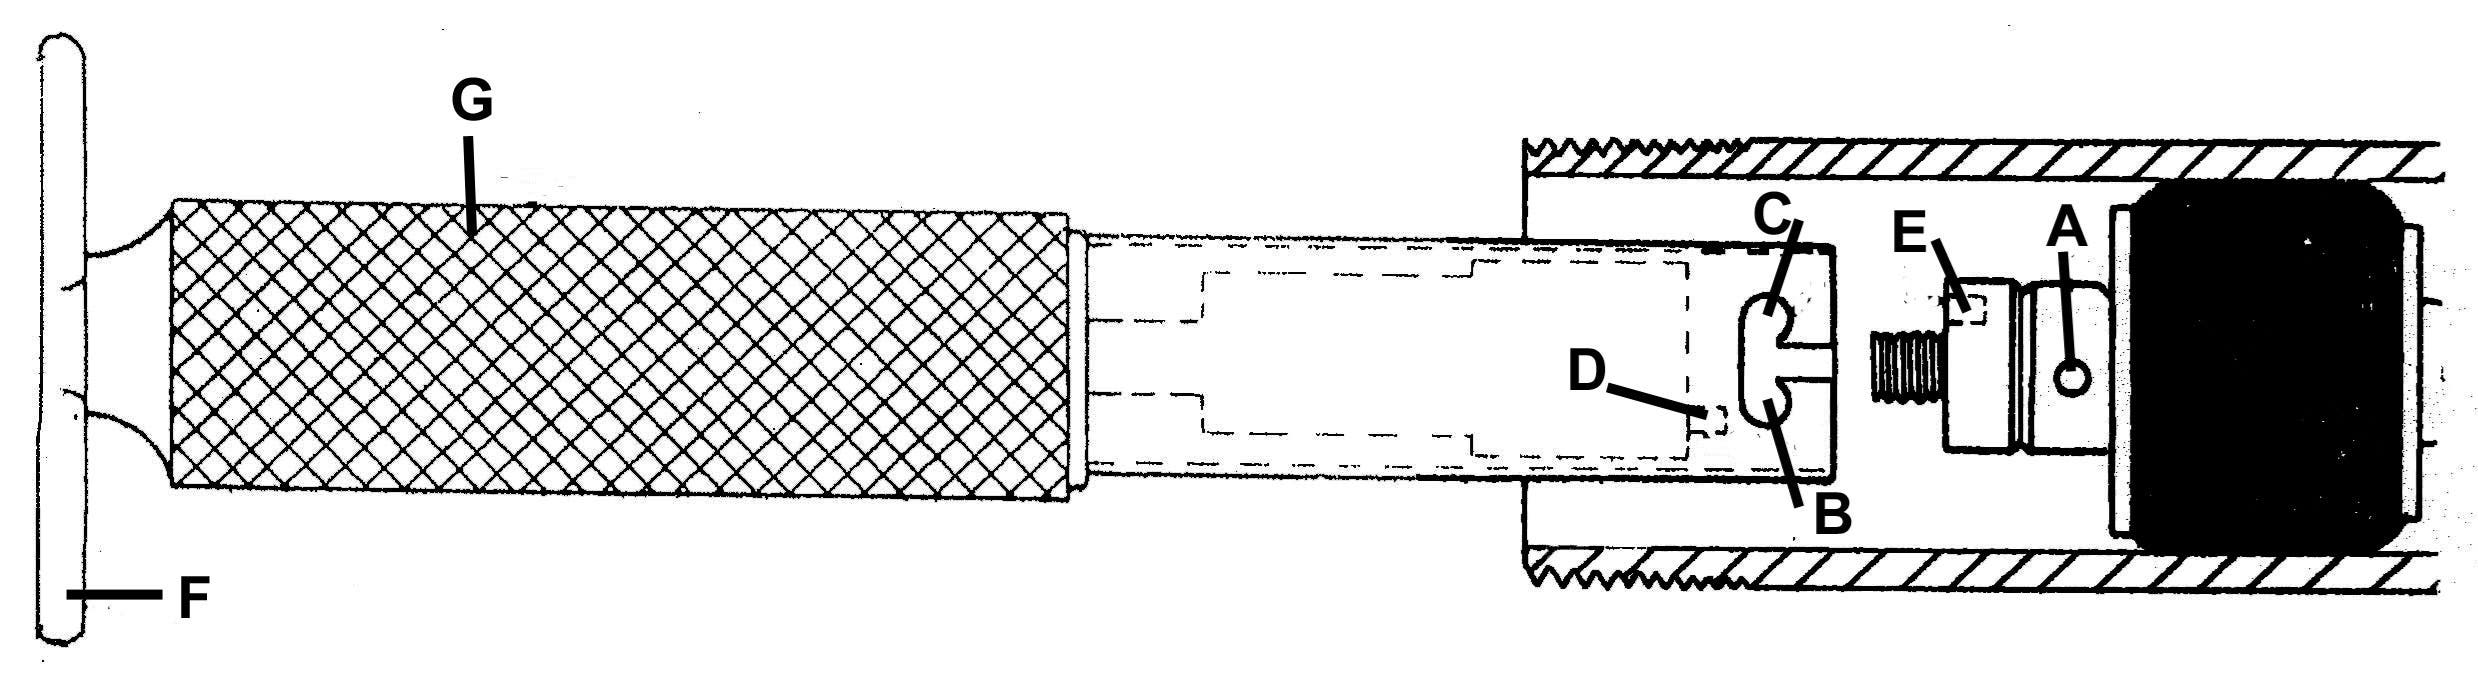
INSTALLATION INSTRUCTIONS
- Slip the plug onto the end of the wrench engaging pin "A" into the slot at the end of the wrench.
- Turn the pin "A" into notch "B". This will hold the plug onto the end of the wrench.
- Turn the wrench handle "F" clockwise with one hand while holding the wrench at "G" with the other until pin "D" on the wrench drops into the hole "E" in the Expander plug nut.
- Insert the plug into the fitting or pipe.
- Hold the wrench at "G" and turn the handle "F" clockwise to expand the plug.
To remove the wrench just push in on the wrench and turn clockwise enough to let pin "A" out of notch "B" and out the slot at the end of the wrench.
REMOVAL INSTRUCTIONS
- Slip notch in end of wrench over pin "A" and turn wrench right engaging pin "A" into notch at "C."
- Hold the wrench at "G" with one hand and turn the wrench handle "F" counterclockwise to release the plug.
- Remove the plug with the wrench.
Only hand tighten the plug to prevent damage to the wrench or plug. In expanding the plug, don't use any extra leverage on the wrench handle "F" as it is not necessary to tighten the plug any tighter than the ordinary man can pull on handle "F." Any extra leverage would tend to damage the wrench or the plug.
Product Selection
 Custom Manufacturing Solutions
 Drain Flushers & Sewer Cleaning Tools
  High Pressure Mechanical Pipe Plugs
  Hot Tap Machines & Equipment
  Inflatable Annular Seals, Bladders & Duct Plugs
  Inflatable Lifting Air Bags & Pipe Handlers
  Inflatable Packer Carriers
  Inflation Accessories & Pipeline Fittings
  Low Pressure Mechanical Pipe Plugs
  Multi-Flex® Chemical Resistant Inflatable Pipe Plugs
  PeteStop® Inflatable Line Stop Pipe Plugs
  PeteStop® Line Stop Systems, Components & Tools
  Pipe Plugs - Inflatable
  Pipe Plugs - Mechanical
  Pipeline Test Equipment
  Rubber Molded Inflatable Pipe Plugs
  Temperature and Pressure Test Plugs
  Tools for Contractors